- 1 Introduction to Beaver Builder
- 1.0.1 Improve Your Designs with Beaver Themer
- 1.0.2 Discover the Full Beaver Builder Toolkit
- 1.0.3 Creating Pages with Beaver Builder
- 1.0.4 Step 1: Create a New Page
- 1.0.5 Step 2: Pick a Template
- 1.0.6 Step 3: Arrange the Layout with Columns and Prebuilt Rows
- 1.0.7 Step 4: Add More Modules
- 1.0.8 Step 5: Save Rows, Columns, and Modules for Later Use
- 1.0.9 Conclusion
Introduction to Beaver Builder
Building a WordPress page used to mean dealing with complicated layouts, shortcodes, or custom code. For many website owners, that process felt slow and frustrating. Beaver Builder changed that experience by introducing a simple visual page builder that lets you design pages directly on the screen.
Beaver Builder works with a drag and drop system. Instead of writing code, you can place rows, columns, images, text blocks, and other elements exactly where you want them. You see your changes immediately, which makes designing a page much easier and faster.
Another great thing about Beaver Builder is that it works with most WordPress themes. This flexibility allows you to build custom layouts without needing to switch themes or redesign your entire website. Whether you are creating a landing page, a service page, or a blog layout, Beaver Builder gives you full control over the design.
Many beginners enjoy using it because the interface is easy to understand. At the same time, developers and designers appreciate the level of customization it provides. This balance between simplicity and flexibility is what makes Beaver Builder one of the most popular page builders for WordPress.
Improve Your Designs with Beaver Themer
While Beaver Builder is excellent for creating page layouts, Beaver Themer takes things a step further. It allows you to design parts of your website that usually require theme customization.
With Beaver Themer, you can build headers, footers, blog templates, and archive layouts. Instead of relying on your theme’s default design, you can create a unique look that matches your brand and style.
For example, you might want a custom header for your entire site or a special layout for your blog posts. Beaver Themer lets you design these areas visually using the same drag and drop interface that Beaver Builder uses.
Another advantage of Beaver Themer is its ability to work with dynamic content. This means you can design templates that automatically pull information from your posts or pages. For instance, a blog template can display the post title, featured image, author name, and other details without you having to add them manually each time.
For anyone who wants more design freedom, Beaver Themer is a powerful addition to the Beaver Builder ecosystem.
Discover the Full Beaver Builder Toolkit
Beaver Builder is more than just a page builder plugin. It is part of a larger set of tools that help you create professional WordPress websites.
The main plugin focuses on page building and layout design. It includes a wide variety of modules such as text editors, images, buttons, galleries, and sliders. These modules allow you to add different types of content to your pages with just a few clicks.
There is also the Beaver Builder Theme, which is designed to work perfectly with the plugin. This theme provides a clean foundation that makes it easy to build fast and responsive websites.
When you combine the Beaver Builder plugin, Beaver Themer, and the Beaver Builder Theme, you get a complete website building solution. This setup gives you full control over both page layouts and overall site structure.
For many website creators, this combination removes the need for multiple plugins and complicated theme customization.
Creating Pages with Beaver Builder
Creating a page with Beaver Builder is a simple process. The builder allows you to design your page visually while keeping the workflow organized and easy to follow.
Here is a step by step look at how you can create a page using Beaver Builder.
Step 1: Create a New Page
Start by logging into your WordPress dashboard. From the left side menu, click on Pages and then select Add New.
Give your page a title that reflects its purpose. For example, you might create a page for services, contact information, or a landing page for a product.
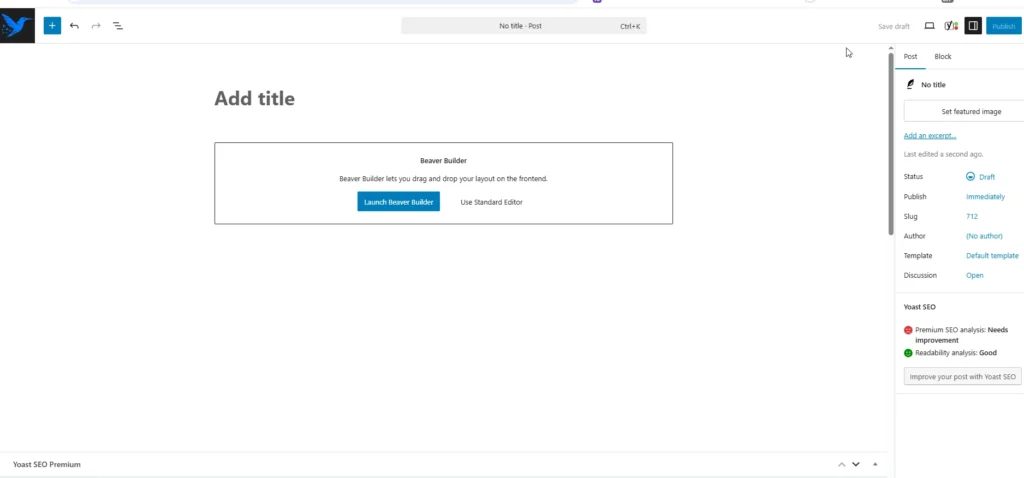
Once the page is created, you will see a button that says Launch Beaver Builder. Click on this button to open the visual builder.
The page will reload and display the Beaver Builder interface. From here, you can begin designing your layout directly on the screen.
Step 2: Pick a Template
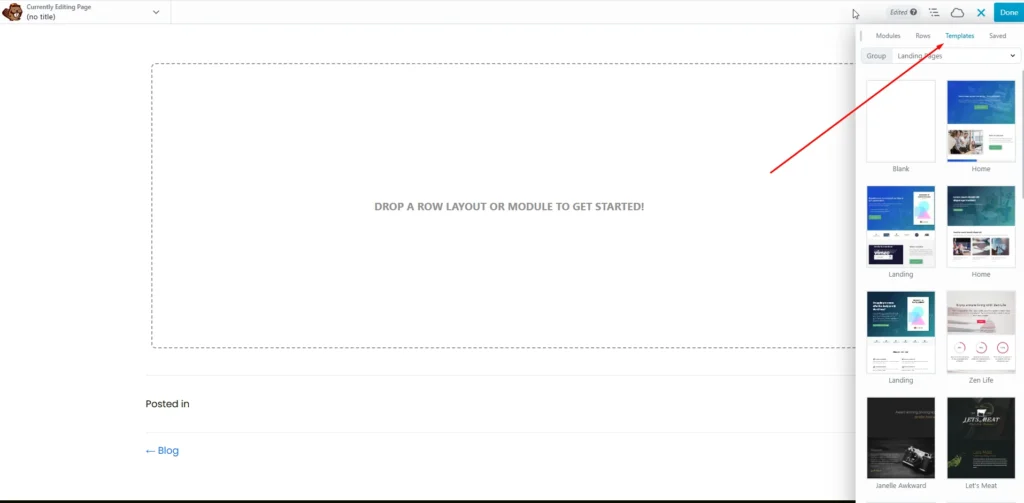
Beaver Builder includes a collection of ready made templates that can help you get started quickly.
Templates are useful when you want a professional looking layout without building everything from scratch. They are especially helpful for landing pages, service pages, and small business websites.
When you open the templates panel, you will see several design options. Select the one that fits your needs, and it will instantly load onto your page.
After applying a template, you can change the text, images, and layout to match your content. Think of the template as a starting point that you can customize freely.
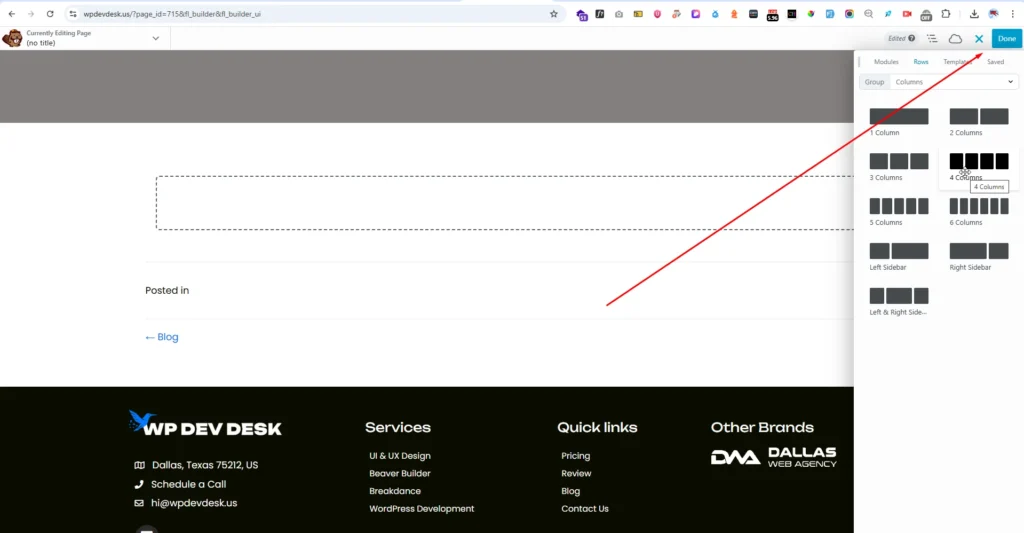
Step 3: Arrange the Layout with Columns and Prebuilt Rows
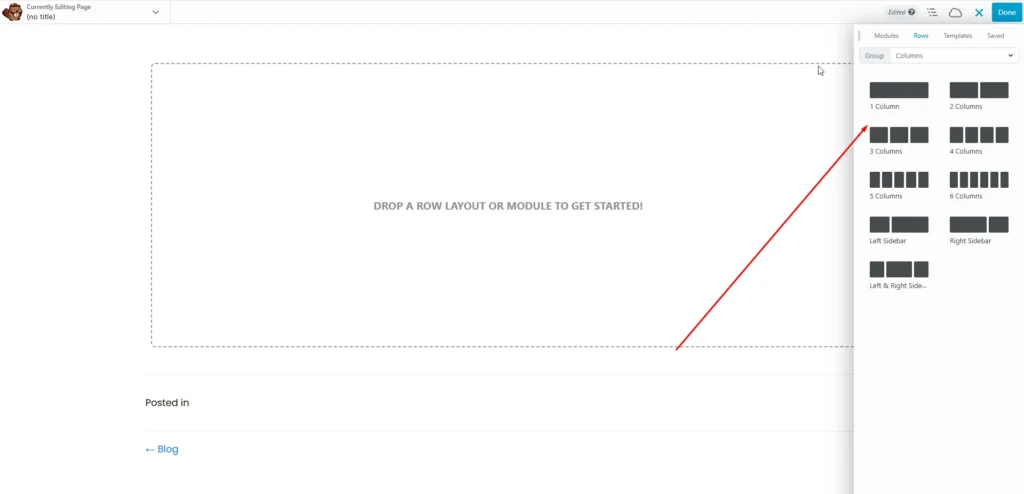
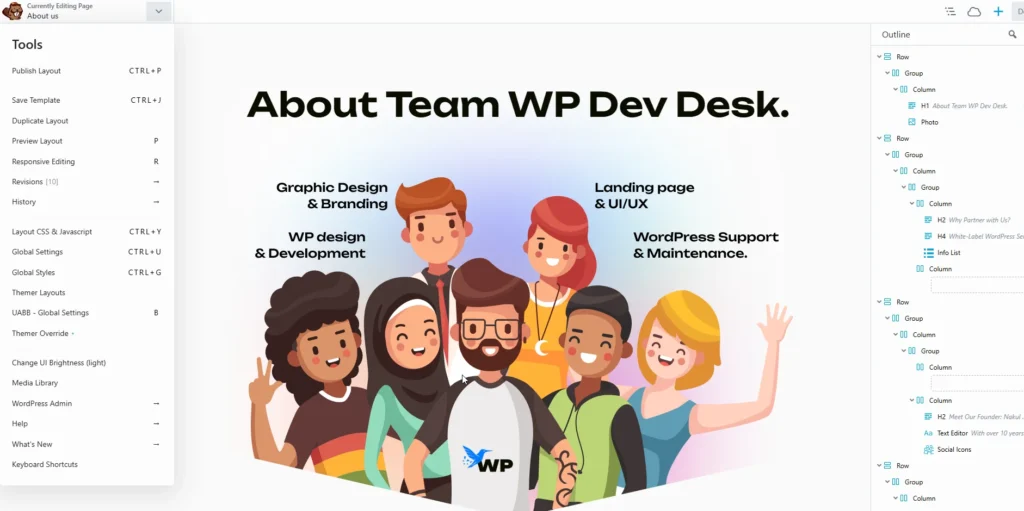
The structure of a Beaver Builder page is based on rows and columns. Rows divide the page horizontally, while columns split each row vertically.
This system allows you to create flexible layouts that adjust easily on different screen sizes.
For example, you might create a row with two columns to place an image on one side and text on the other. You can also add rows with three or four columns if you want to display multiple pieces of content side by side.
Beaver Builder also offers prebuilt rows. These are ready made layout sections that already contain a combination of columns and modules.
Using prebuilt rows can save time because the design structure is already set up. You simply insert the row and replace the content with your own text and images.
Step 4: Add More Modules
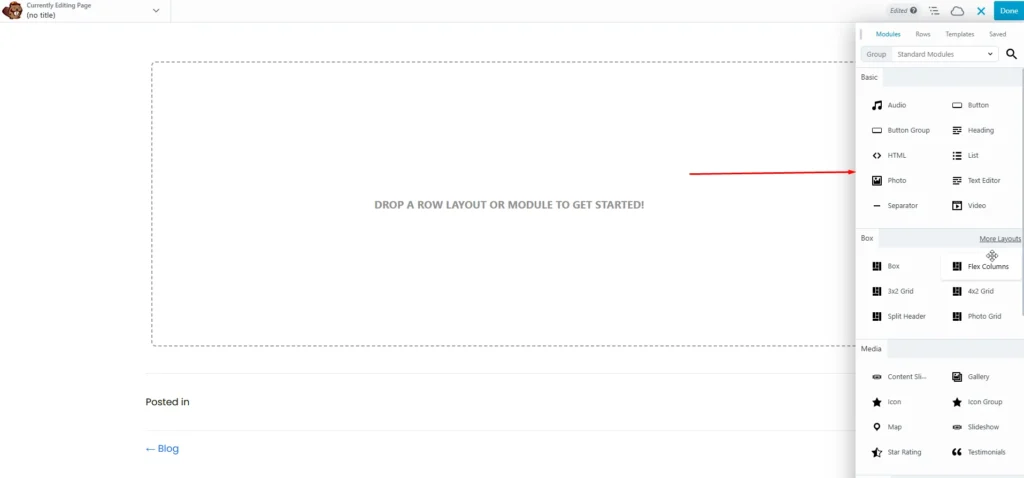
Modules are the building blocks of your page content. They allow you to add different types of elements to your layout.
Common modules include text editors, headings, images, buttons, videos, and photo galleries. Each module can be placed inside a column by dragging it into position.
Once a module is added, you can open its settings to adjust the content, colors, spacing, and other design details.
For example, you might add a button module to create a call to action, or insert an image module to highlight a product or service.
Because the builder is visual, you can see the changes instantly while editing. This makes it easier to experiment with different design ideas until you find the one that looks right.
Step 5: Save Rows, Columns, and Modules for Later Use
One feature that many users find helpful is the ability to save design elements for later use.
If you create a row, column layout, or module design that you like, you can save it as a reusable element. This allows you to insert the same design into other pages without rebuilding it from scratch.
For example, you might create a contact section with a heading, text, and a button. Instead of recreating that section every time, you can save it and reuse it on multiple pages.
This feature helps maintain consistency across your website and also speeds up the page creation process.
Conclusion
Beaver Builder makes WordPress page design simple and accessible. Its drag and drop interface allows you to build beautiful layouts without touching a single line of code.
From choosing templates to arranging rows and adding modules, every step of the process is designed to be straightforward and flexible. You can create professional pages while still having the freedom to customize every detail.
When combined with Beaver Themer and the Beaver Builder Theme, the platform becomes an even more powerful tool for building complete WordPress websites.
Whether you are a beginner starting your first website or a designer creating client projects, At Wp Dev Desk, Our Beaver Builder developers provide the tools needed to design pages quickly and confidently.